Author: Block Master

  • Hosting a Legendary LEGO Movie Marathon

    Introduction

    LEGO movies have captured the imagination of both young and old, weaving together humor, action, and heartwarming stories. Whether you’re a die-hard LEGO aficionado or just looking for a fun movie night idea, a LEGO movie marathon can be a fantastic way to spend time with friends and family. Here’s your guide to hosting an unforgettable event.

    Step 1: Select the LEGO Movies

    Begin by choosing which LEGO movies you want to feature. You have several exciting options, including The LEGO Movie, The LEGO Batman Movie, The LEGO Ninjago Movie, and The LEGO Movie 2: The Second Part. Consider the ages and interests of your audience when making your selection.

    Step 2: Plan Your Viewing Schedule

    Create a viewing schedule that includes start times for each movie, intermission breaks, and any planned activities. Be sure to factor in meal and snack times to keep everyone energized.

    Step 3: Set Up a Comfortable Viewing Area

    Ensure your viewing area is comfortable and can accommodate your audience. Arrange seating to allow for good visibility and consider adding extra cushions or bean bags for a cozy touch.

    Step 4: Bring LEGO into the Scene

    Enhance the theme of your marathon by decorating your space with LEGO sets and minifigures. You could also set up a small LEGO building station where guests can build their own creations during breaks.

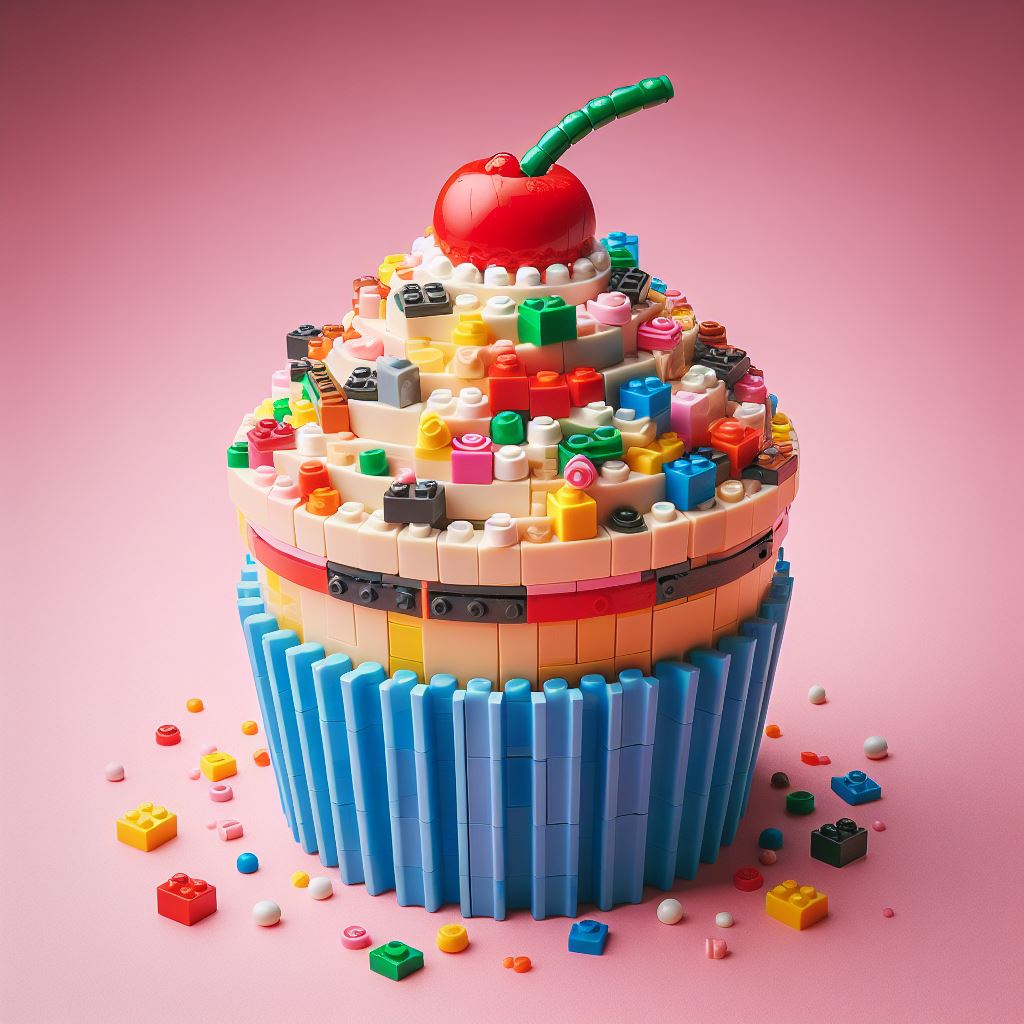
    Step 5: Prepare LEGO-Themed Snacks

    Get creative with your menu by preparing LEGO-themed snacks. Ideas include building-block shaped sandwiches, LEGO brick rice crispy treats, and colorful cupcakes decorated to look like LEGO pieces.

    Step 6: Engage Your Audience with Activities

    Keep the fun going between movies with LEGO-related activities. Consider hosting a LEGO building contest, a trivia quiz based on the movies, or even a LEGO minifigure costume contest.

    Conclusion

    A LEGO movie marathon can be an exciting event that brings together LEGO fans of all ages. With thoughtful planning and a sprinkle of creativity, you can create a memorable experience that celebrates the joy of LEGO and the magic of movies. Let the building and the movie magic begin!

  • Creating LEGO-Themed Party Hats

    Creating LEGO-Themed Party Hats

    Throwing a LEGO-themed party? Amp up the fun with DIY LEGO party hats! This easy, creative project is perfect for adding a unique touch to your celebration. You’ll have your guests buzzing with excitement, ready to build memories. Whether for a birthday party, a LEGO-building party, or just for fun, these hats are sure to impress.

    Materials Needed

    • Plain party hats (preferably in primary colors)
    • Colored paper (to match LEGO colors)
    • Scissors
    • Glue stick or hot glue gun
    • LEGO bricks for inspiration or as props
    • Ruler (optional)
    • Marker or pen

    Instructions

    1. Preparation: Start by measuring and cutting the colored paper into rectangular strips that will mimic LEGO bricks. These should be proportional to the size of the party hats, with enough space to look cohesive once glued on. A good size to start with is approximately 2 inches by 4 inches.
    2. Application: Apply glue to one side of the colored strips and begin attaching them to the party hats. Arrange them in a brick pattern, overlapping slightly for a more authentic look. Ensure you cover the hat evenly for a uniform appearance.
    3. Detailing: Once the basic brick pattern is set, take your marker or pen to draw the circular dots characteristic of LEGO bricks. Place these circles strategically to mimic the brick’s studs. This detail transforms the paper strips into believable LEGO bricks.
    4. Final Touches: If you wish, you can add a real LEGO piece or mini-figure to the top of each hat using hot glue for a fun, three-dimensional effect. This is a fantastic way to tailor the hats to your party’s specific LEGO theme (e.g., LEGO Ninjago, LEGO City).

    And there you have it! Your very own, handmade LEGO-themed party hats. This project not only brings an extra layer of fun and customization to your party but also gets guests in the perfect mindset for a day filled with LEGO building and creativity. Enjoy your brick-tastic celebration!

  • Creating Lego-Themed Party Favors

    Planning a Lego-themed party can be as enjoyable as it is creative. One of the highlights of such gatherings is undoubtedly the party favors, which offer a unique opportunity to send your guests home with a memorable piece of the fun. This guide will walk you through creating simple yet delightful Lego-themed party favors, adding a special touch to your event that attendees of all ages will cherish.

    Materials Needed

    • Lego bricks (assorted sizes and colors)
    • Small fabric bags or clear plastic containers
    • Customizable thank you tags
    • Assorted small Lego figurines (optional)
    • Ribbons or twine
    • Permanent markers or stickers for personalization

    Step-by-Step Guide

    1. Select a Container: Choose whether you would prefer a rustic look with fabric bags or a modern appeal with clear plastic containers. Both options should be small enough to hold comfortably but large enough to fit a handful of Lego pieces and possibly a figurine.
    2. Fill With Legos: Fill your chosen containers with an assortment of Lego bricks. You can stick to a color scheme to match your party’s theme or go with a colorful mix for a fun, eclectic look. If you’ve chosen to include Lego figurines, place one in each favor as a special surprise.
    3. Customize Your Thank You Tags: Craft or print thank you tags, then personalize them for your event. You could write a simple message, the date of the party, or even the names of the attendees if you’re feeling particularly festive.
    4. Tie It All Together: Use ribbons or twine to attach your thank you tags to the favors. If using fabric bags, you can simply tie the bag closed with the ribbon or twine. For plastic containers, you may need to punch a hole in the corner of the tag to thread the ribbon through.
    5. Add Personal Touches: Consider personalizing the containers with the guests’ names using permanent markers or stickers. This not only makes the favors feel more personal but helps in distributing them during the party.

    Additional Tips

    • For an eco-friendly option, consider using recyclable or biodegradable containers.
    • Think outside the box by including unique Lego pieces or sets related to the event’s theme.
    • Involve your child or the guest of honor in the assembling process for a personalized touch.

    Creating Lego-themed party favors is a fantastic way to bring an extra layer of excitement to your event. With a little creativity and some basic materials, you can craft memorable keepsakes that reflect the playful spirit of Legos and the joy of your special occasion.

  • Creating a Lego Duplo Play Area for Younger Guests

    Creating a Lego Duplo Play Area for Younger Guests

    Organizing an event that’s fun for all ages includes catering to the youngest of guests. Setting up a Lego Duplo play area can provide endless entertainment for children while ensuring they’re engaged in safe, imaginative play. This guide will walk you through creating a space that’s both enjoyable and secure for little builders.

    Step 1: Choosing the Right Space

    Find an area that’s easily visible to parents but away from major foot traffic. Ensure the space is on a soft surface or lay down mats to cushion accidental falls.

    Step 2: Selecting Duplo Sets

    Opt for a wide variety of Duplo sets that cater to different interests, including animals, vehicles, and basic building blocks. Ensure the pieces are large enough and suitable for the age group you’re catering to.

    Step 3: Safety First

    Before the event, inspect all pieces for damages that could pose a safety risk. Set up the area away from any sharp corners or hard surfaces. During the event, have a dedicated area monitor to oversee play and ensure children’s safety.

    Step 4: Organizing the Play Space

    Use low tables or mats laid out with Duplo pieces for easy access. Consider organizing blocks by color or theme to stimulate creativity and simplify cleanup.

    Step 5: Interactive Elements

    Add interactive elements like Duplo-compatible play mats or build challenges to engage children further. These can also serve as focal points for cooperative play.

    Step 6: Encouraging Creativity

    Aside from free play, organize short, guided activities or challenges that encourage creativity and teamwork among the young guests.

    Step 7: Clean Up Plan

    Have a clear plan for cleanup, including sanitizing blocks before and after the event. Consider providing hand sanitizer stations near the play area for both children and parents.

    Conclusion

    With careful planning and attention to safety, a Lego Duplo play area can be a wonderful addition to any event, ensuring younger guests have a memorable time while allowing parents to relax and enjoy the festivities.

  • Build-Your-Own LEGO Race Track

    Build-Your-Own LEGO Race Track

    Introduction

    Building a LEGO race track is an exciting project for LEGO fans of all ages. Whether you’re an experienced builder or just starting, this guide will help you construct a custom race track that brings your racing fantasies to life.

    Materials Needed

    • A variety of LEGO bricks and plates
    • LEGO baseplates for the foundation
    • LEGO car sets or build-your-own race cars
    • Decorative LEGO pieces for embellishment (optional)

    Step 1: Design Your Track Layout

    Start by sketching out your track design on paper. Consider adding curves, straightaways, and fun elements like jumps or tunnels. Once you’re happy with the design, begin laying out the baseplates to match your sketch.

    Step 2: Build the Foundation

    Using large LEGO plates, create the foundation of your track. Connect them securely on a flat surface. This base will support the entire race track, so make sure it’s sturdy.

    Step 3: Construct the Track

    Begin building the actual track using your LEGO bricks. Depending on your design, this could involve constructing straight paths, curves, and elevation changes. Keep in mind the width of your track should accommodate your LEGO cars comfortably.

    Step 4: Add Details and Features

    Now that the basic track is in place, add fun elements like bridges, tunnels, or jumps. You can also include aesthetic details like trees, stands for spectators, or pit stops to make your track come alive.

    Step 5: Test and Tweak

    It’s crucial to test your track with a LEGO car to ensure everything functions as expected. Run the car around the track to check for any issues. Make adjustments as necessary to improve the design or functionality.

    Final Thoughts

    Building your own LEGO race track is a rewarding project that offers limitless possibilities for customization and creativity. Remember, the key to a great race track is not just in the construction but also in the imaginative details that make it uniquely yours.

  • Lego Brick Jewelry Making

    Transform ordinary Lego bricks into stunning, wearable art with this comprehensive guide to Lego brick jewelry making. Whether you’re a Lego enthusiast looking for a new creative outlet or a jewelry maker seeking innovative materials, this tutorial will walk you through the steps to create one-of-a-kind pieces that will add a playful touch to any outfit.

    Materials Needed

    • Lego bricks of various sizes and colors
    • Drill with a small drill bit (1/16 inch or similar for making holes)
    • Jewelry findings (earring hooks, necklace chains, jump rings, clasps)
    • Superglue (optional, for extra security)
    • Small pliers

    Step 1: Design Your Piece

    Start by selecting the Lego bricks you want to use. Consider color combinations and shapes that appeal to you. Simple designs work best, especially for beginners. Lay out your design before you start drilling any holes.

    Step 2: Preparing the Lego Bricks

    Carefully drill holes into your Lego bricks where you want to attach them to the jewelry findings. Proceed slowly to avoid cracking the bricks. A small piece of tape over the drilling area can help stabilize the drill bit.

    Step 3: Assembling Your Jewelry

    Use the jewelry findings to start assembling your piece. For earrings, attach the bricks to earring hooks using jump rings. For necklaces, you may want to string bricks onto a chain or attach them using jump rings. Use small pliers to open and close the jump rings securely.

    Step 4: Final Touches

    Review your assembled jewelry piece for any loose parts. If desired, apply a small amount of superglue to the drilled holes before attaching the findings for additional strength. Allow any glue to dry fully before wearing.

    Conclusion

    With these steps, you’ve now created a unique and personal piece of Lego brick jewelry. Experiment with different designs, colors, and shapes to expand your collection and showcase your creativity. These pieces make excellent gifts for fellow Lego lovers or a charming addition to your own jewelry collection.

    Care and Maintenance

    Care for your Lego brick jewelry as you would any other piece. Keep it dry and store it safely when not in use. With the right care, your Lego jewelry will continue to be a fun and vibrant accessory for years to come. Happy crafting!

  • How to Make Lego-Themed Cake Pops

    How to Make Lego-Themed Cake Pops

    How to Make Lego-Themed Cake Pops

    Whether you’re throwing a Lego-themed birthday party or just want to surprise a Lego lover, making Lego-themed cake pops is a delightful and delicious way to do it. These cake pops are not only cute and colorful, but they’re also a hit with kids and adults alike. Follow these simple steps, and you’ll have adorable Lego-shaped treats in no time.

    Ingredients

    • Your favorite cake recipe (or box cake mix)
    • Buttercream frosting
    • Candy melts in various colors (red, blue, yellow, green)
    • Mini M&Ms or similar small candies for the Lego ‘pegs’
    • Cake pop sticks
    • Styrofoam block (for drying)

    Step 1: Bake the Cake

    Prepare your cake according to the recipe or box instructions. Once baked, allow it to cool completely. This will make it easier to crumble and mix with frosting later.

    Step 2: Crumble and Mix

    When the cake has cooled, crumble it into a large bowl. Add frosting gradually and mix until the mixture is moist enough to hold together but not too sticky. You’ll want a texture that can be easily shaped.

    Step 3: Shape the Pops

    Take portions of the cake mixture and shape them into small rectangles, mimicking the shape of Lego bricks. Place these on a tray lined with parchment paper. Refrigerate for at least an hour to firm up.

    Step 4: Decorate

    Melt the candy melts according to package instructions. Dip the end of each cake pop stick into the melted candy, then insert into the base of each brick. This helps the cake pops stay on the sticks. Freeze for another 15 minutes to set.

    Once set, dip each cake pop into the melted candy, ensuring it’s fully coated. Tap off any excess coating. Before the candy hardens, place six mini M&Ms on top of each brick to represent the Lego pegs. Allow them to dry by standing them up in a styrofoam block.

    Tips for Perfect Cake Pops

    • Ensure your cake pops are chilled thoroughly before dipping; this helps the coating set quickly.
    • If your candy coating is too thick, thin it with a little vegetable oil for easier dipping.
    • Get creative with colors and decorations to match specific Lego themes.

    There you have it, your own batch of Lego-themed cake pops ready to delight at any party or gathering. Not only will these be a conversation starter, but they’re also a testament to your creativity and culinary skill. Enjoy!

  • Creating a Lego-themed Ring Toss Game

    Creating a Lego-themed Ring Toss Game

    Creating a Lego-themed Ring Toss Game

    Ring toss games are a classic source of fun that can be enjoyed by people of all ages. By incorporating Lego into the design, you can create a customizable and visually appealing game that enhances the excitement. This guide will walk you through the steps to build your own Lego-themed ring toss game, perfect for parties, family gatherings, or just a creative weekend project.

    Materials Needed

    • Lego baseplates
    • A variety of Lego bricks
    • Plastic rings or DIY Lego rings
    • Optional: Minifigures and other decorative Lego elements

    Step-by-Step Instructions

    1. Design the Base: Begin by deciding the size of your game. Use Lego baseplates as the foundation. Connect them until you have your desired size. This will serve as the ground where the players will stand to toss the rings.
    2. Build the Posts: Using a variety of Lego bricks, construct several posts of different heights. These will serve as the targets for the ring toss. Make sure they are sturdy and tall enough to challenge the players but not too difficult to aim at.
    3. Create Rings: If you do not have plastic rings, you can create your own rings using flexible Lego pieces, such as Lego Technic parts. Ensure the rings are large enough to fit over the posts but not too loose.
    4. Add Decorative Elements: This is where you can get creative. Use Lego minifigures, flowers, or any decorative pieces to make your game visually appealing. You can also theme your game based on your favorite Lego series.
    5. Set Up Game Rules: Decide on the rules for your game. You might assign different point values to each post based on their difficulty, or create team-based gameplay. Be sure to adjust the rules based on the age and skill level of the players.

    Tips for a Successful Game

    • Ensure stability: Make sure your posts are securely built to withstand repeated ring tosses.
    • Variation: Build posts of varying heights and difficulty levels to keep the game interesting for players of all ages.
    • Playtest: Before the final game, test it out to make sure everything works as expected and adjust as necessary.

    Creating a Lego-themed ring toss game is not only a fun activity but also a great way to challenge your creativity and engineering skills. Enjoy building and playing your game!

  • Creating Lego-themed Board Games

    Transform your family game nights with custom-made Lego-themed board games. This guide will walk you through creating unique, engaging, and fun-to-play board games using the Lego pieces you already have. Whether you’re crafting with kids or looking to build a complex game for adults, Lego offers endless possibilities for creativity and challenge.

    Step 1: Conceptualize Your Game

    Start with a clear theme or concept. Do you want a race-to-the-finish game, a strategy game, or maybe a mystery to solve? Decide on the mechanics and rules based on your theme. For a Lego city, you could do a builder’s race, or for a Lego castle, perhaps a knight’s quest. Brainstorm with your players for fun ideas.

    Step 2: Build Your Board

    Use a large Lego baseplate as your board, or connect several smaller baseplates to create a custom shape. Design the path players will navigate, marking start and end points. Include special spots for bonuses, challenges, or detours. Integrate Lego buildings, landscapes, or vehicles to enhance the theme.

    Step 3: Create Characters and Pieces

    Decide if players will use standard minifigures or build their own characters. You can also craft items or objectives that players must collect. For added fun, create unique pieces that have special abilities or roles within the game, like a car that can leap over obstacles or a wizard who can teleport.

    Step 4: Establish Rules and Objectives

    Write clear, concise rules that cover how to win, how a player’s turn works, and what happens when specific game squares are landed on. Ensure the objectives are fun but challenging, keeping the game balanced. Include any unique game mechanics like dice rolls, card drawing, or time limits.

    Step 5: Test and Refine

    Playtest your game with family or friends, adjusting rules and gameplay as needed. Ask for feedback and be ready to tweak the design or mechanics to improve the experience. Remember, the goal is balanced, engaging gameplay that offers a blend of strategy, luck, and fun.

    Step 6: Customize and Share

    Add final touches by customizing the board and pieces with additional Lego bricks or accessories. Consider creating a story or backstory for your game to give it depth. Once complete, share your creation on Lego fan sites, social media, or with local game clubs to inspire others.

    Conclusion

    Creating a Lego-themed board game is a fun and rewarding project that can bring hours of entertainment. It’s a fantastic way to bond with family and friends while indulging in creative construction and strategic play. So gather your Lego bricks, unleash your imagination, and start building your board game masterpiece today!

  • Setting Up a Lego-Themed Coloring Station

    Creating a Lego-themed coloring station is a fantastic way to add color, creativity, and a bit of structured fun to any event. Whether you’re planning a birthday party, a community gathering, or simply a family get-together, this simple yet effective setup will surely be a hit among Lego enthusiasts of all ages. Here’s a step-by-step guide that will take you through the process, ensuring your Lego-themed coloring station is a resounding success.

    1. Gather Your Materials

    • Lego-themed coloring pages – These can be easily found online and printed.
    • A variety of coloring tools – Include crayons, markers, colored pencils, and anything else that can add a splash of color.
    • Clipboards or hard surfaces – These provide a firm base for coloring.
    • Lego decorations – Use actual Legos, Lego cutouts, and themed tablecloths to set the mood.
    • Comfortable seating – Ensure everyone has a comfortable place to sit and color.

    2. Set Up the Coloring Area

    Choose a space that is well-lit and inviting. Arrange the tables and chairs in a way that encourages interaction and sharing among participants. Decorate the area with Lego-themed items to excite and inspire the artists. Place the clipboards and coloring sheets on the tables, making sure there are plenty for everyone. Organize the coloring tools in easy-to-reach containers in the middle of the table, encouraging exploration and choice.

    3. Engage Participants

    As guests arrive, guide them towards the coloring station. Encourage them to choose their favorite Lego-themed coloring sheet and dive into the world of colors. For added fun, introduce challenges or themed coloring contests with small Lego sets as prizes.

    4. Facilitate and Enjoy

    Throughout the event, make sure to interact with the participants, offering encouragement and praise for their creative efforts. Take pictures of the artwork and display them in a dedicated area or on a digital slideshow. This not only celebrates the participants’ creativity but also adds to the event’s communal spirit.

    5. Clean-Up and Follow-Up

    After the event, organize a quick and efficient clean-up. Collect the coloring tools, dispose of any waste, and neatly arrange the reusable materials for next time. Consider creating a digital album of the artworks and sharing it with the participants as a memento of the fun day.

    Setting up a Lego-themed coloring station is a delightful way to promote creativity and inclusion at your event. By following these simple steps, you can ensure that participants of all ages will have an enjoyable and memorable experience, leaving with colorful creations and happy memories.